Tutorials6 min read
How to Make an Animatic, Step by Step, with Examples
A worked example of making an animatic: 12 storyboard panels in three sequences, a first timing pass, temp voice, music and effects, review notes, and how panels turn into final shots. With AI tools for each step.
An animatic is your storyboard placed on a timeline and timed to sound. This page is the practical part: a worked example, panel by panel, of turning a storyboard into an animatic you can watch, judge and fix. If you want the definition and the difference between an animatic, a storyboard and a previs first, read what is an animatic.
The example is the pilot of Kestrel Bay, a sample series we made in Cinemagiq to show the product: three sequences of four shots each, drawn as pencil storyboards, then made into keyframes and clips.
Step 1: Lay out the panels in sequences
Start with one panel per shot, grouped into the sequences of the script. Order matters more than polish at this stage: rough pencil is enough, as long as each panel shows who is in frame, where the camera is, and what changes.
The pilot's first sequence, the harbour at dawn:
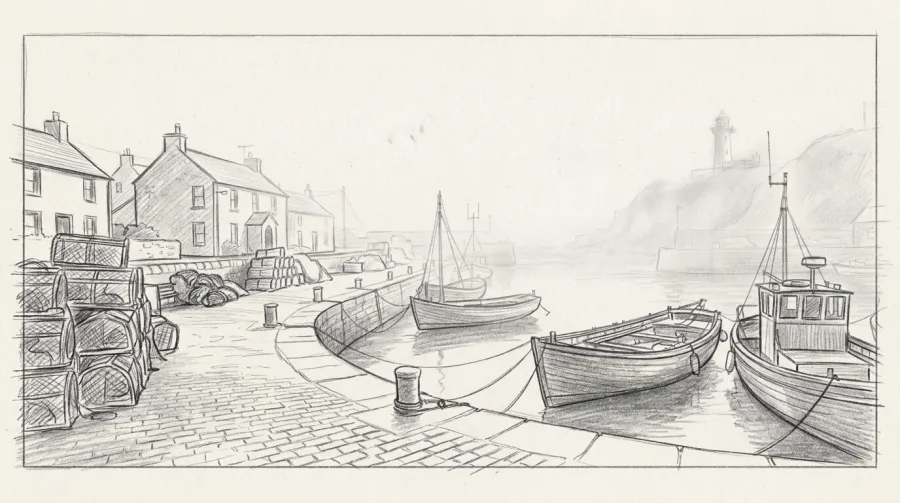
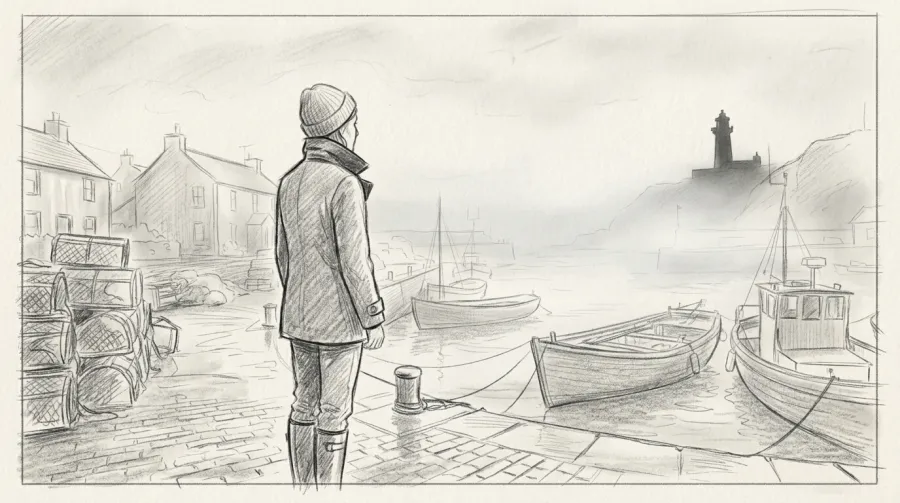
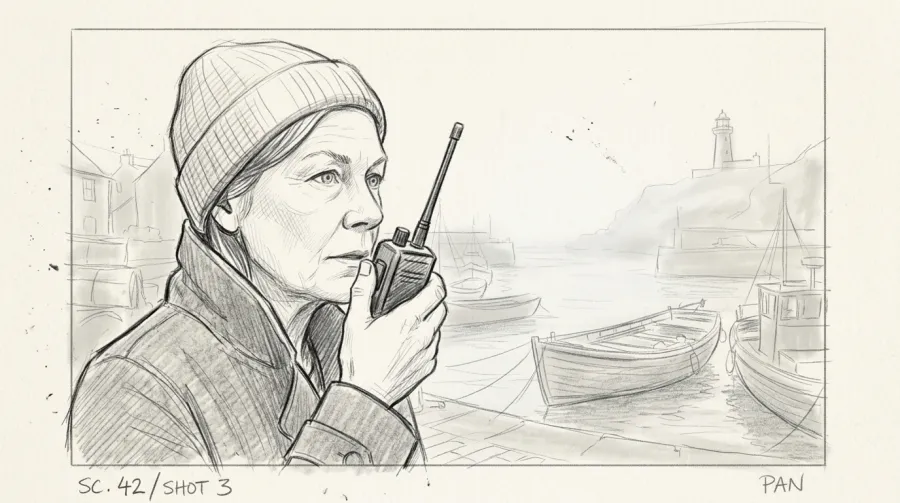
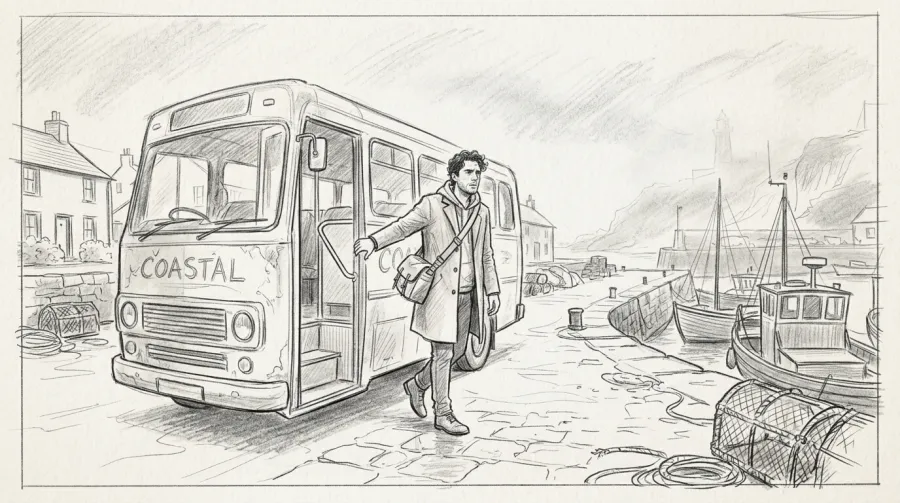
The second sequence follows the cliff road to the lighthouse, and the third goes inside: the spiral stairs, a logbook, the lamp room. Twelve panels in all.
Step 2: A first timing pass
Give every panel a starting length before you add any sound. The numbers below are a first pass for the pilot, not rules: they exist so the timeline has a shape you can react to.
| Panel | What we see | First pass |
|---|---|---|
| 01 | Wide of the harbour in fog | 3.0 s |
| 02 | The woman on the quay, looking out | 2.5 s |
| 03 | Close-up, she speaks into the radio | length of the line |
| 04 | He steps off the bus | 2.5 s |
| 05 | Two figures on the cliff road, far away | 3.0 s |
| 06 | Walking and talking | length of the lines |
| 07 | The lighthouse on the rocks | 2.0 s |
| 08 | The door of the lighthouse, open | 1.5 s |
| 09 | Climbing the spiral stairs | 2.0 s |
| 10 | Insert: the open logbook | 1.5 s |
| 11 | He photographs the lens | 2.0 s |
| 12 | An old woman waits in the lamp room | hold for the reveal |
Three habits make the first pass useful:
- Wides set the place, so give them a beat longer. The viewer needs a moment to read a new location.
- Dialogue sets its own length. Time the panel to the line, not the other way round, which is why the voice track comes next.
- Inserts are short. A logbook or a hand on a rail reads in about a second and a half.
Step 3: Add a temporary voice
Record or generate a scratch voice for every line and place it on its own track. AI voices are good enough for this: you are judging rhythm, not performance. Two things to listen for:
- Does each line have room to land before the cut?
- Do two lines in a row from different shots overlap or leave a gap that feels like a mistake?
Stretch or shorten the dialogue panels until the lines breathe. This one pass usually changes the length of a scene more than any other. For voices, effects and music, see AI voiceover and sound design.
Step 4: Music and three or four sound effects
Lay a music track under the whole sequence, then add only the effects that mark a beat: the bus door, the radio crackle, the wind on the cliff, the heavy lighthouse door. An animatic with every footstep is hard to judge; one with a handful of accents tells you where the cuts fall.
If the music has a clear change (a swell, a drop), line a cut up with it. If two cuts land just off a beat, move the panels, not the music.
Step 5: Watch it full screen, then take notes
Play the whole thing full screen, at least twice, without stopping. Then write notes against shot numbers:
- "05 holds too long: cut to 2 s."
- "10 is gone before the line in the logbook can be read: give it 2.5 s."
- "12: hold one more second before the cut to black."
Fix the notes, then watch it again the next day. Fresh eyes find the shot that drags.
Before a big re-time, keep a copy of the version you have, so you can go back when the experiment does not work.
Step 6: Replace panels with real shots
Once the timing is locked, the animatic becomes the plan for production. Each panel turns into a keyframe made from the drawing, and each keyframe into a clip of the length the animatic gave it. You only make the shots that survived the cut, at the length they need.
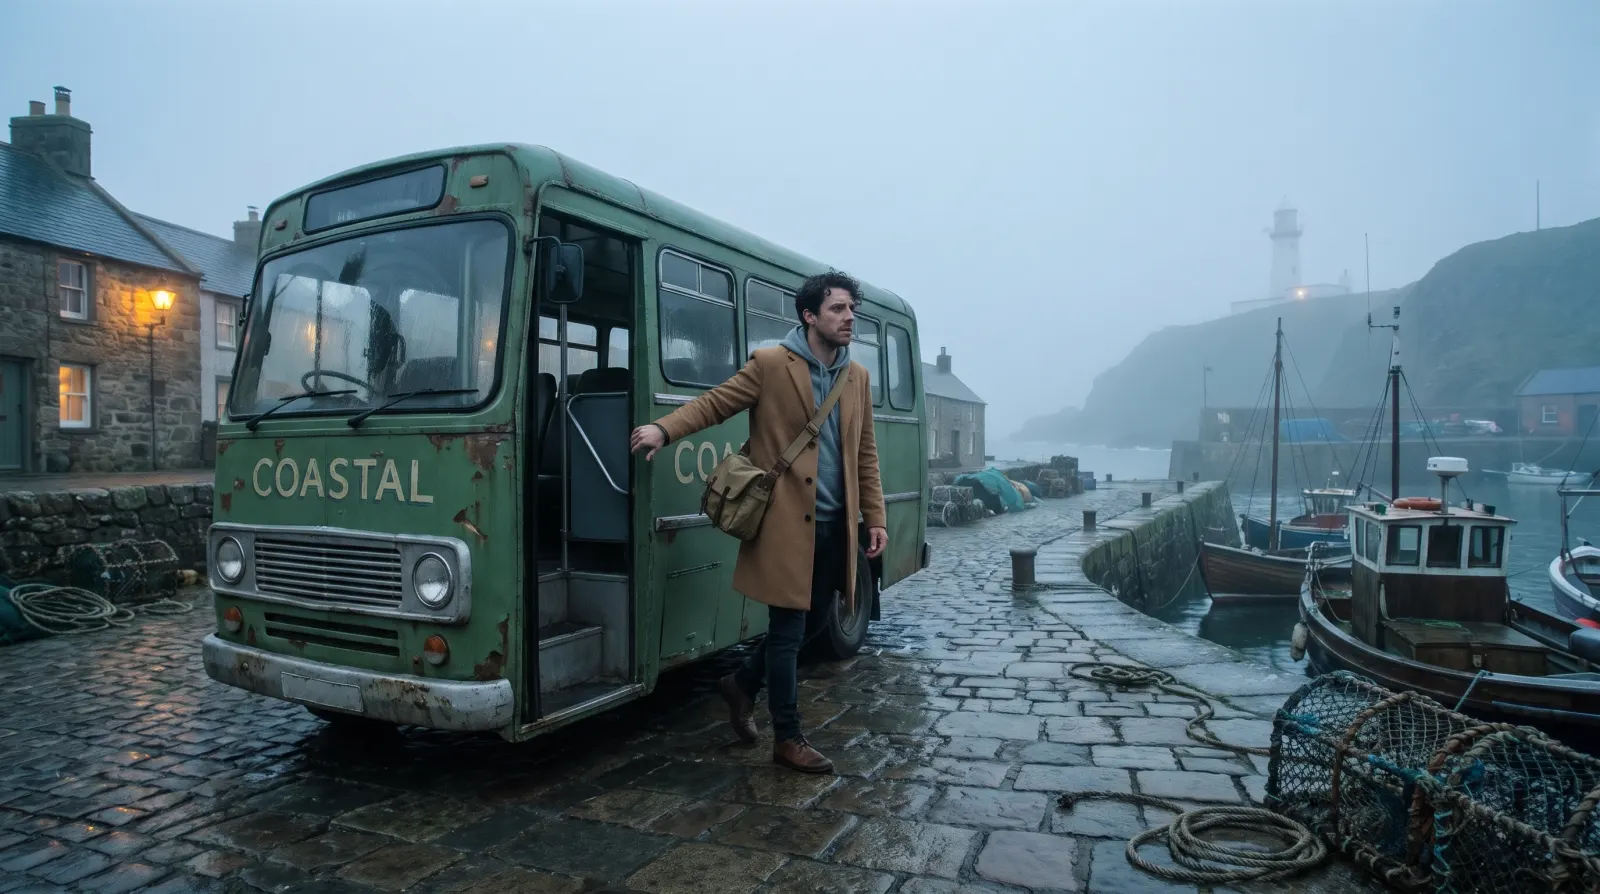
In the pilot, panel 4 became the keyframe above, and the keyframe became a clip. Attach the character's turnaround sheet as a reference when you make keyframes like this one, so the character matches every other shot.
Swap the panels for clips one by one and watch again: motion changes timing. A walk that read well as a 2.5-second still can feel slow once it moves.
Mistakes to avoid
- Polishing panels before timing them. Rough panels you can re-order cost nothing; finished ones make you reluctant to cut.
- Judging silently. Without at least a temp voice and music, every panel feels too long.
- Timing by the numbers. A table is a start. The full-screen viewing decides.
- Generating final shots first. The animatic tells you which shots you need and how long; generating before it means paying for shots that get cut.
How to do it in Cinemagiq
In Cinemagiq the storyboard timeline is the animatic. Panels sit on a Video track with Voiceover, Music and SFX tracks under it, sequence audio is placed with its start times worked out for you, and the full-screen player plays the result. The Generation Studio makes the pencil panels, the keyframes, the clips and the ElevenLabs voices, effects and music in the same project, so a panel you timed is the same picture you later turn into a shot. Save As keeps a copy before a big re-time, and on the Production Board every shot carries its storyboard, keyframe and clip side by side.
See the AI storyboarding guide for drawing the panels, or the Production Board for tracking every shot after the animatic.
Frequently asked questions
How do I make an animatic?
Put your storyboard panels in order on a timeline, give each one the time its beat needs, add a temporary voice track, music and a few sound effects, then watch it full screen and re-time until the scene plays. Replace panels with real shots once the timing is locked.
How long should each panel be held in an animatic?
As long as the action or the line takes, not a fixed length. A useful first pass: 2 to 3 seconds for a wide that sets the place, the length of the line for dialogue, about 1.5 seconds for an insert or a reaction. Then trust the full-screen viewing over the numbers.
Do I need moving pictures for an animatic?
No. Still panels are enough to judge pacing. Add a quick video draft only where the timing depends on motion, such as a fall, a run or a camera move that reveals something.
What software do I need to make an animatic?
Anything with a timeline and audio tracks. A production tool that keeps the storyboard, the audio and the shots in one project saves the most time, because the panels you time are the same ones you later replace with final shots.
How many panels does a scene need for an animatic?
One panel per shot, plus an extra panel wherever a shot changes a lot inside itself (a camera move that ends somewhere new, a character entering). In the example on this page, each of the three sequences has four panels.